Subdivision
Introduction
Sometimes, just simply creating a lowpoly retopologized mesh might not be enough. One common way of working is to create a concept sculpt first. The concept sculpt can be created digitally. An example is to start with a cube (using brush-based 3D sculpting software), and create a highly detailled digital sculpt. Another example is to make a digital 3D scan using a 3D scanner. The scan can be from either a real world object, such as a phone, a shoe, or a car, or it can be a scan of a traditionally created sculpture using clay, plaster or plasticene.
The most obvious issue you come across is that the lowpoly retopologized mesh that you have created in Topogun will fail to reproduce all the details found in the original highly detailed, high resolution concept sculpt. Trying to retopologize all those high resolution details would be extremely difficult, if not impossible, if you only use the standard mesh creation tools that TopoGun offers.
This issue is easily solved by a very powerful feature in Topogun called Subdivision. By using the Subdivision feature, the artist can faithfully reproduce all the finer details of the concept sculpt or 3D scan and at the same time, preserve the desired edgeflow of the retopologized mesh. With the retopologized mesh acting as a low resolution cage, Topogun will create a high resolution mesh that is derived from either the concept sculpt or 3D scan, retaining it's high level of detail, while at the same time maintaining the superior edgeflow of the retopologized mesh.
Furthermore, this vastly superior mesh can be brought back into your brush-based sculpting application and the in between subdivision levels can be recreated. This results in the retopologized mesh or cage being the lowest level, (usually 0), and the highest level being the subdivided mesh, (usually levels 3-5). All the levels in between the lowest and highest levels, (usually levels 1 - 4), can then be easily created from within your sculpting application.
Using Subdivision
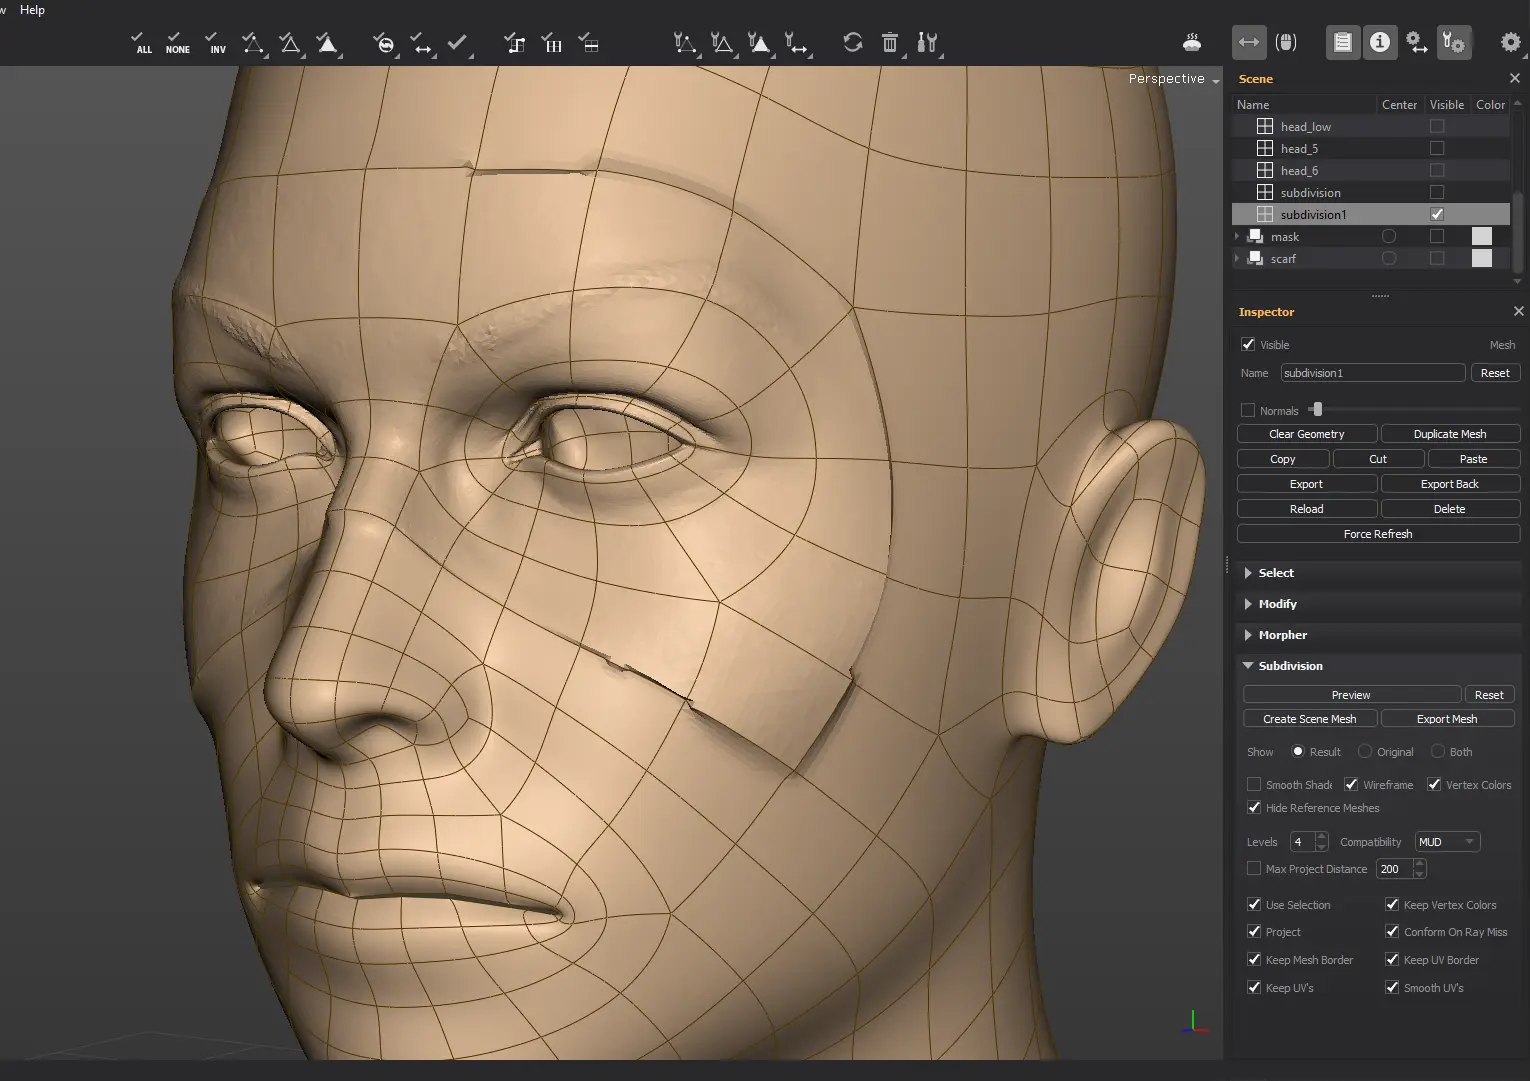
In order to use the Subdivision feature, you must first create a scene, using the reference mesh and the lowpoly retopologized mesh:
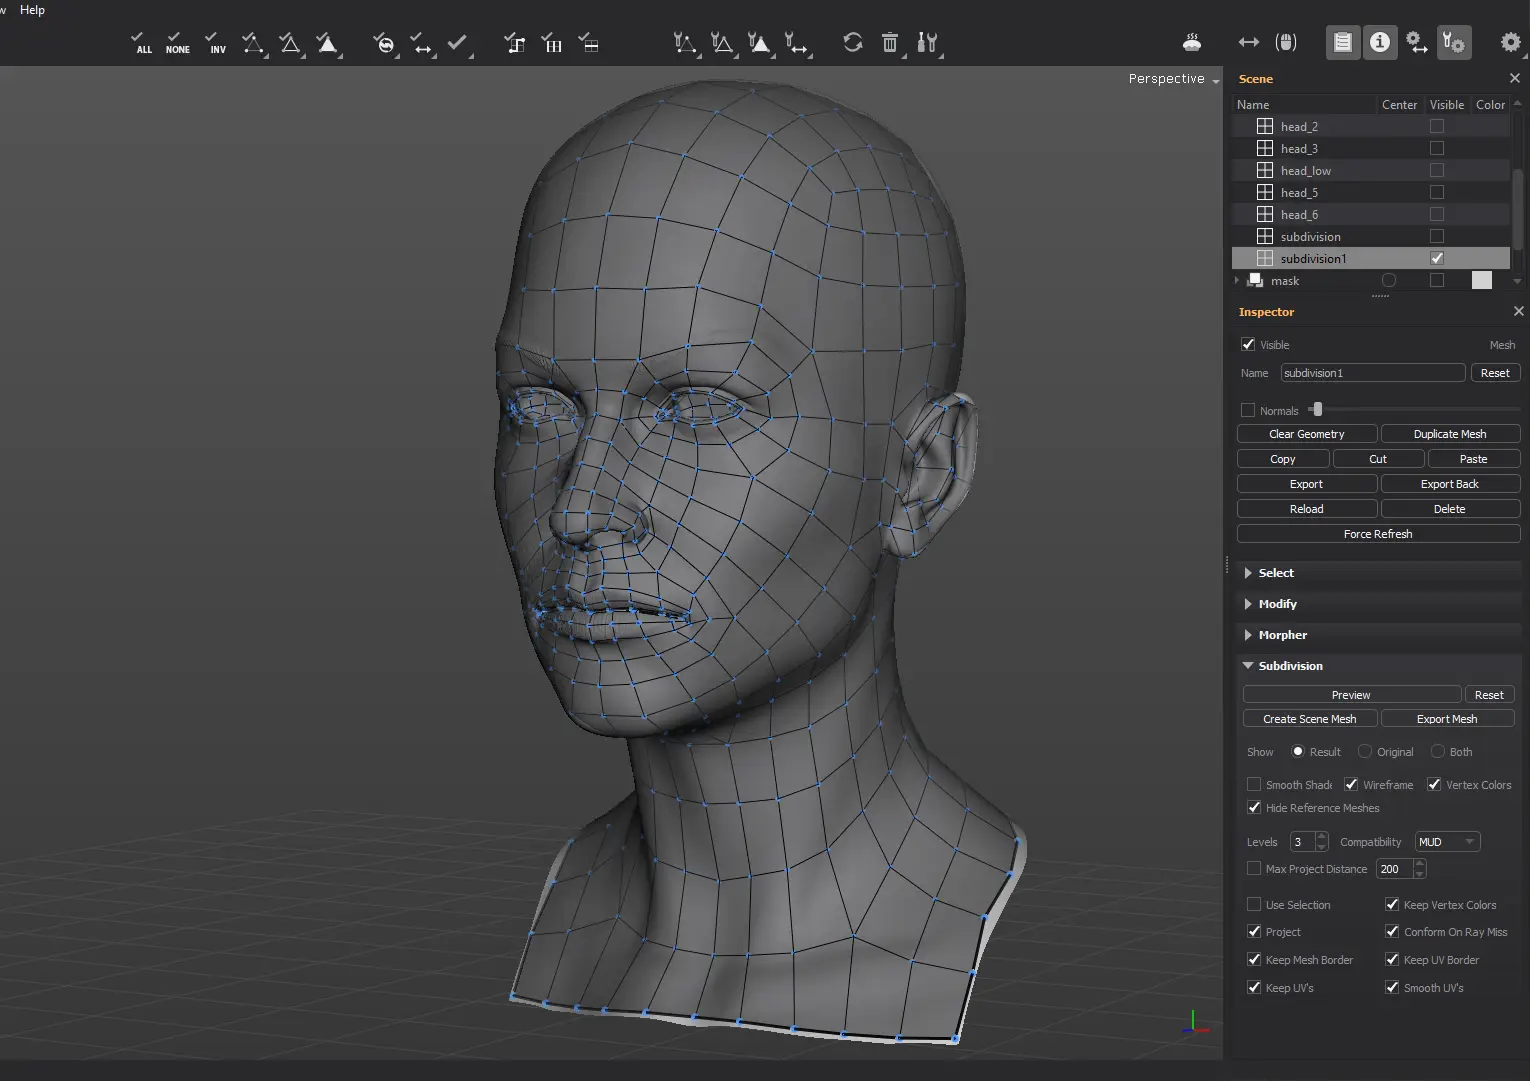
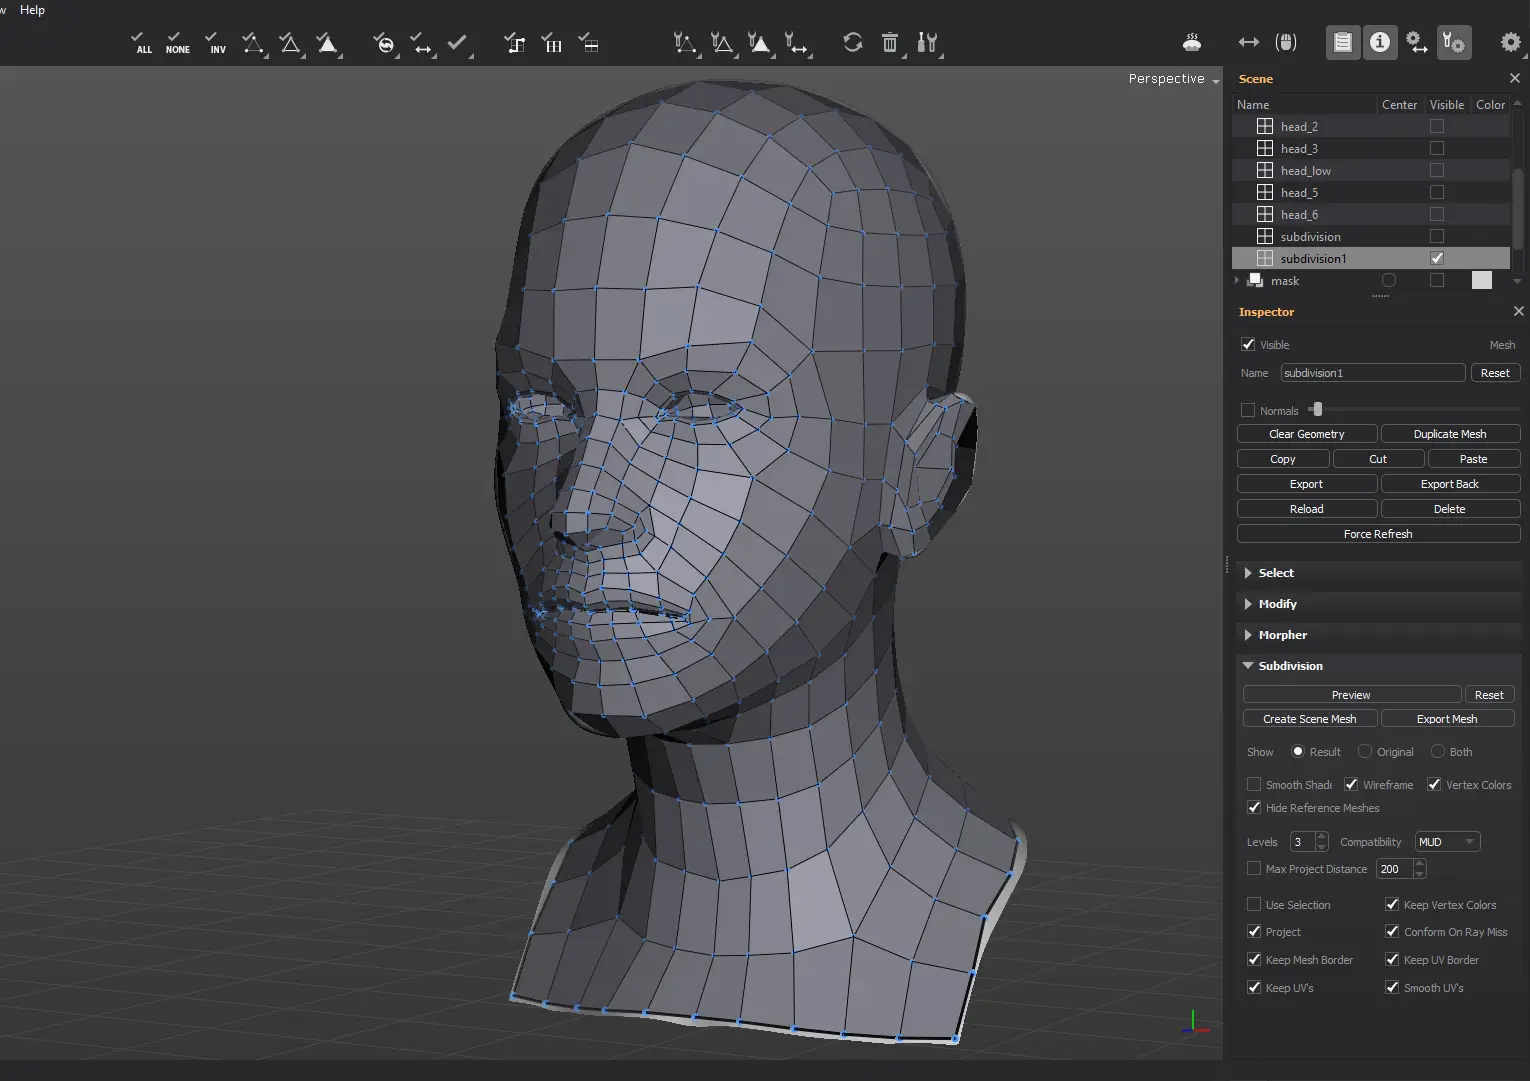
As you can see, polycount of the retopologized mesh is pretty low. When working with TopoGun Subdivision surfaces, your main goal should be to first create a solid base mesh with a clean and efficient edgeflow.
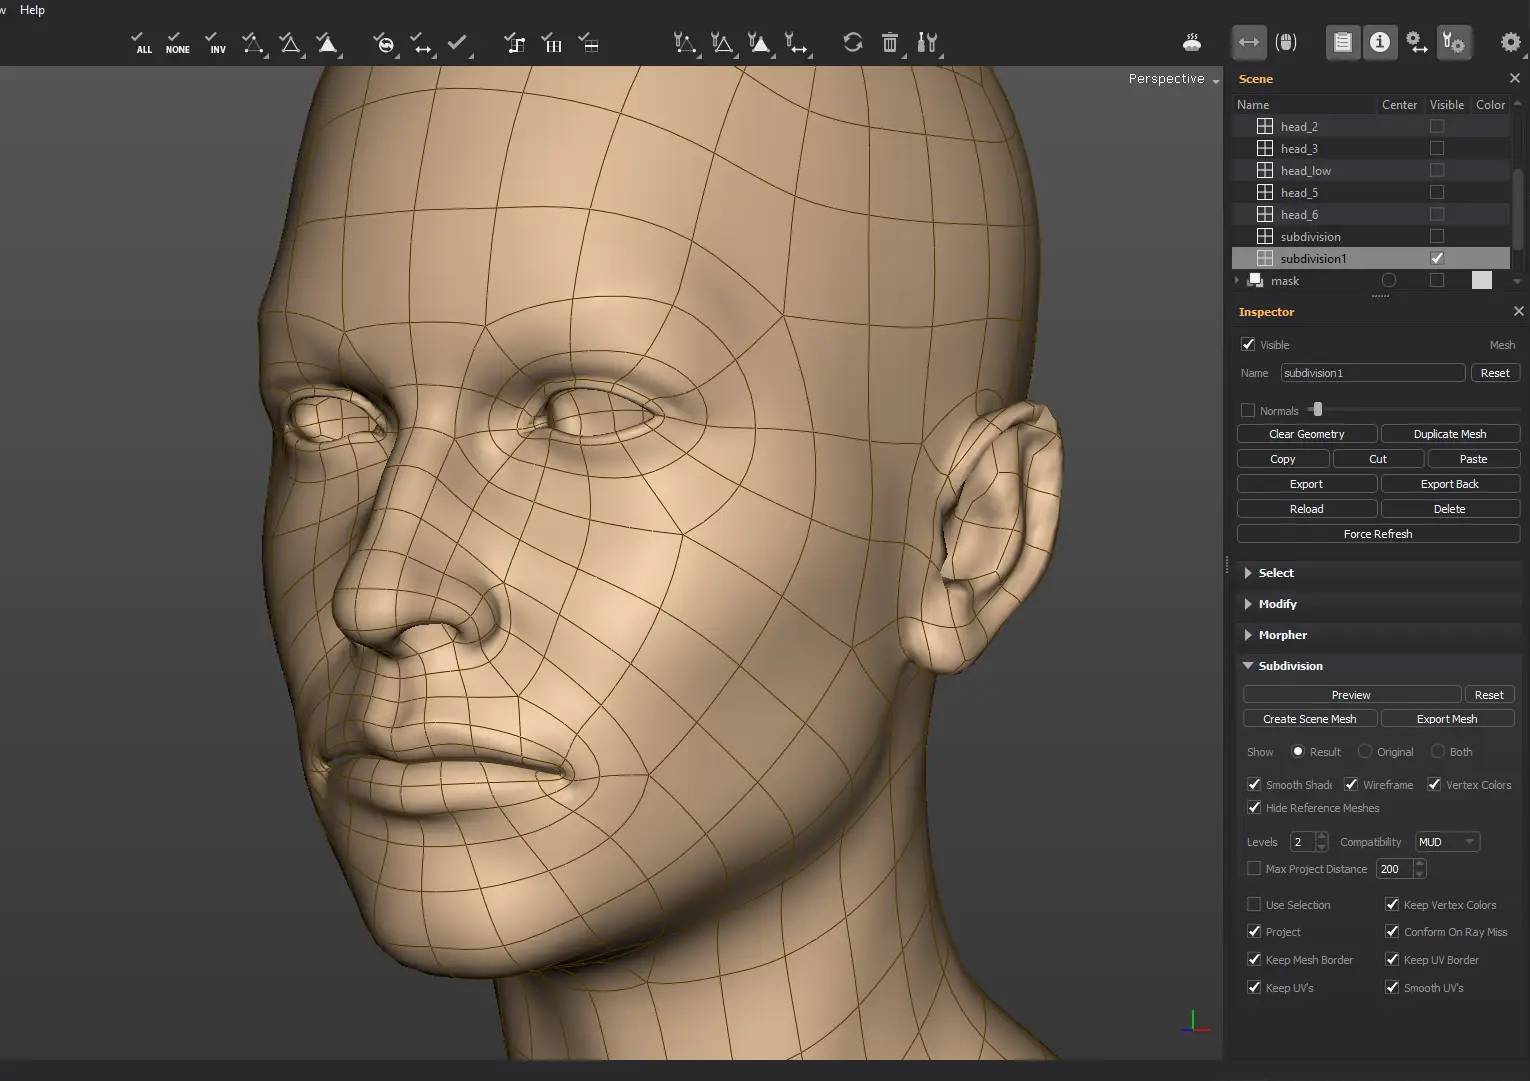
Before exporting the subdivision mesh, you should first preview it, just to make sure everything is working correctly. In order to preview the subdivision, go to the Subdivision feature panel and click on the Preview button. After Topogun makes it's calculations, a subdivided yellow mesh will appear in the viewport, while the scene with the reference mesh and retoplogized mesh will be hidden. The yellow mesh that appears is a subdivided version of the base mesh that is shrinkwrapped or projected over the scene's high resolution reference mesh.
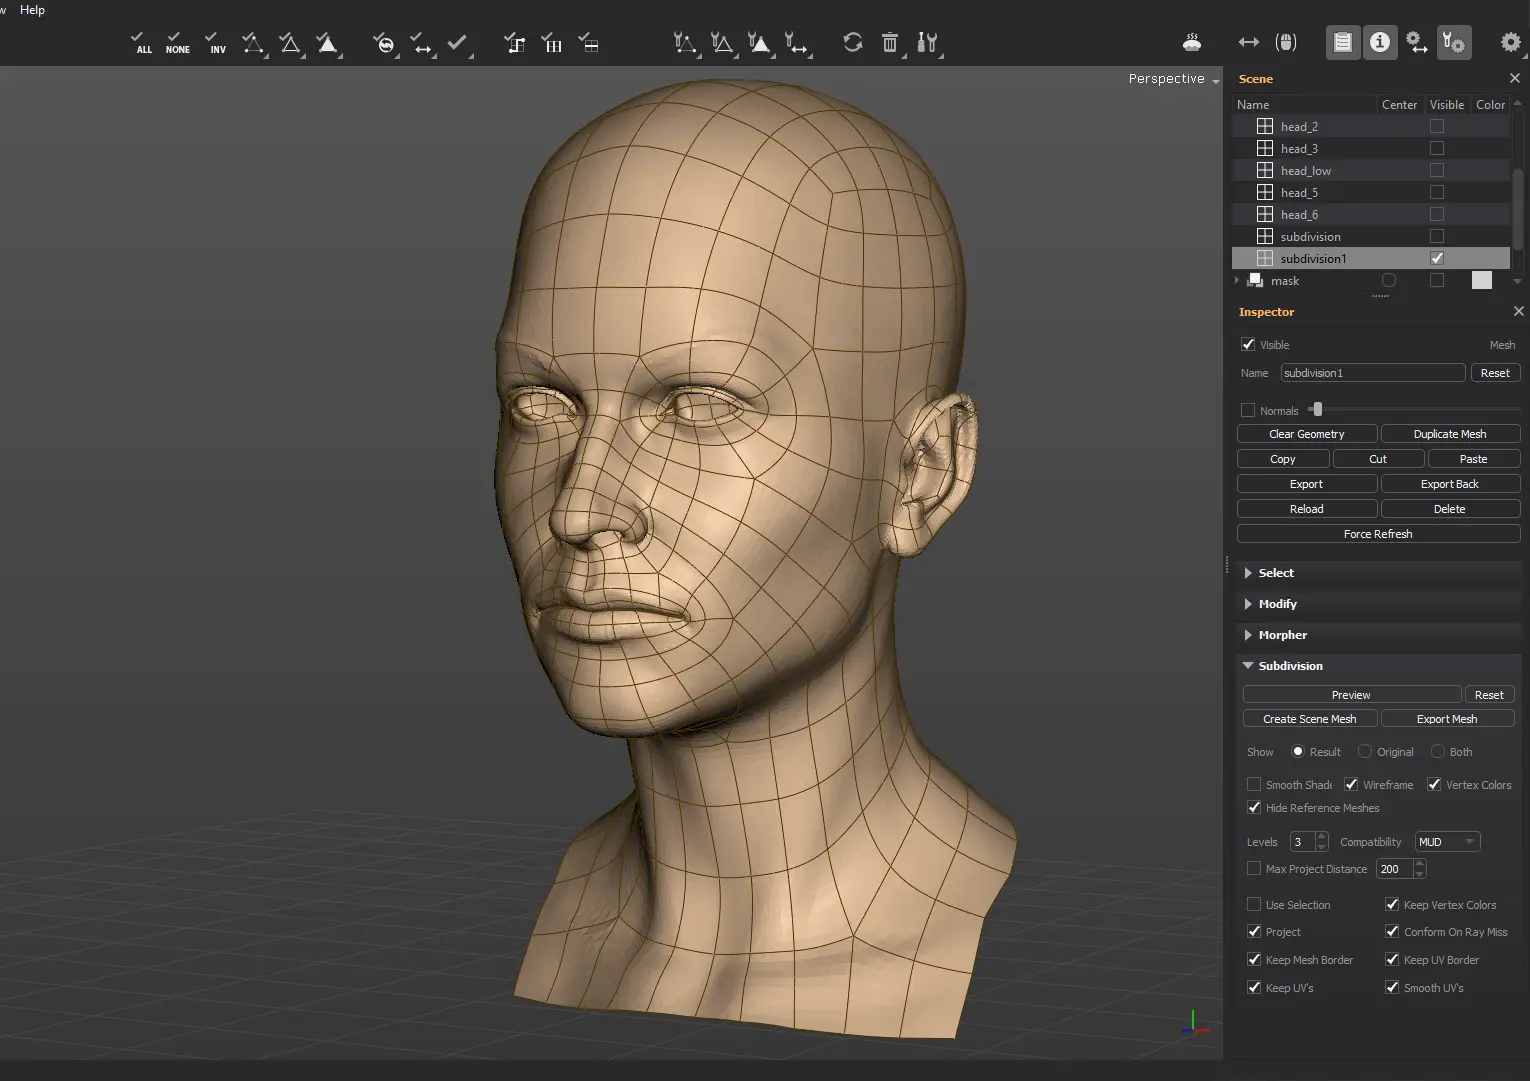
In order to close the subdivision mesh preview and get back to the original scene view, click on the Reset button, or collapse the Subdivision panel.
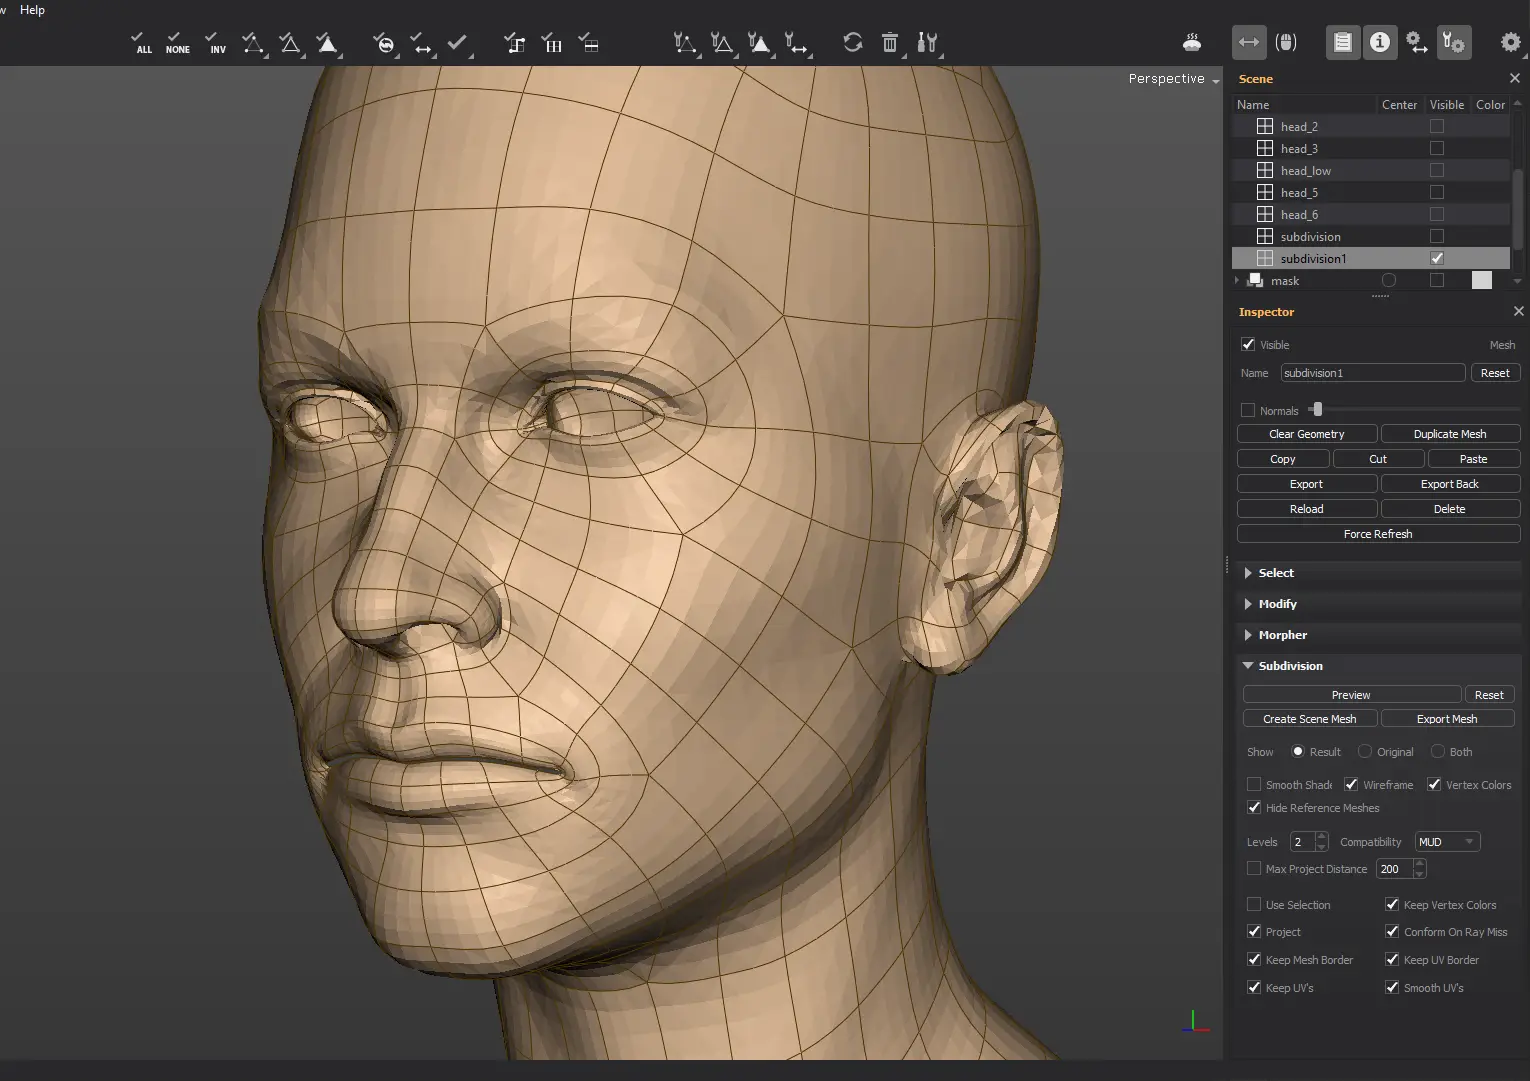
By default, the subdivision level is set to 3. If you need to have a higher polycount, and thus retaining more of the detail of the original reference mesh, you should change the Levels parameter. Here is the result achieved by changing the Levels value from 3 to 5:
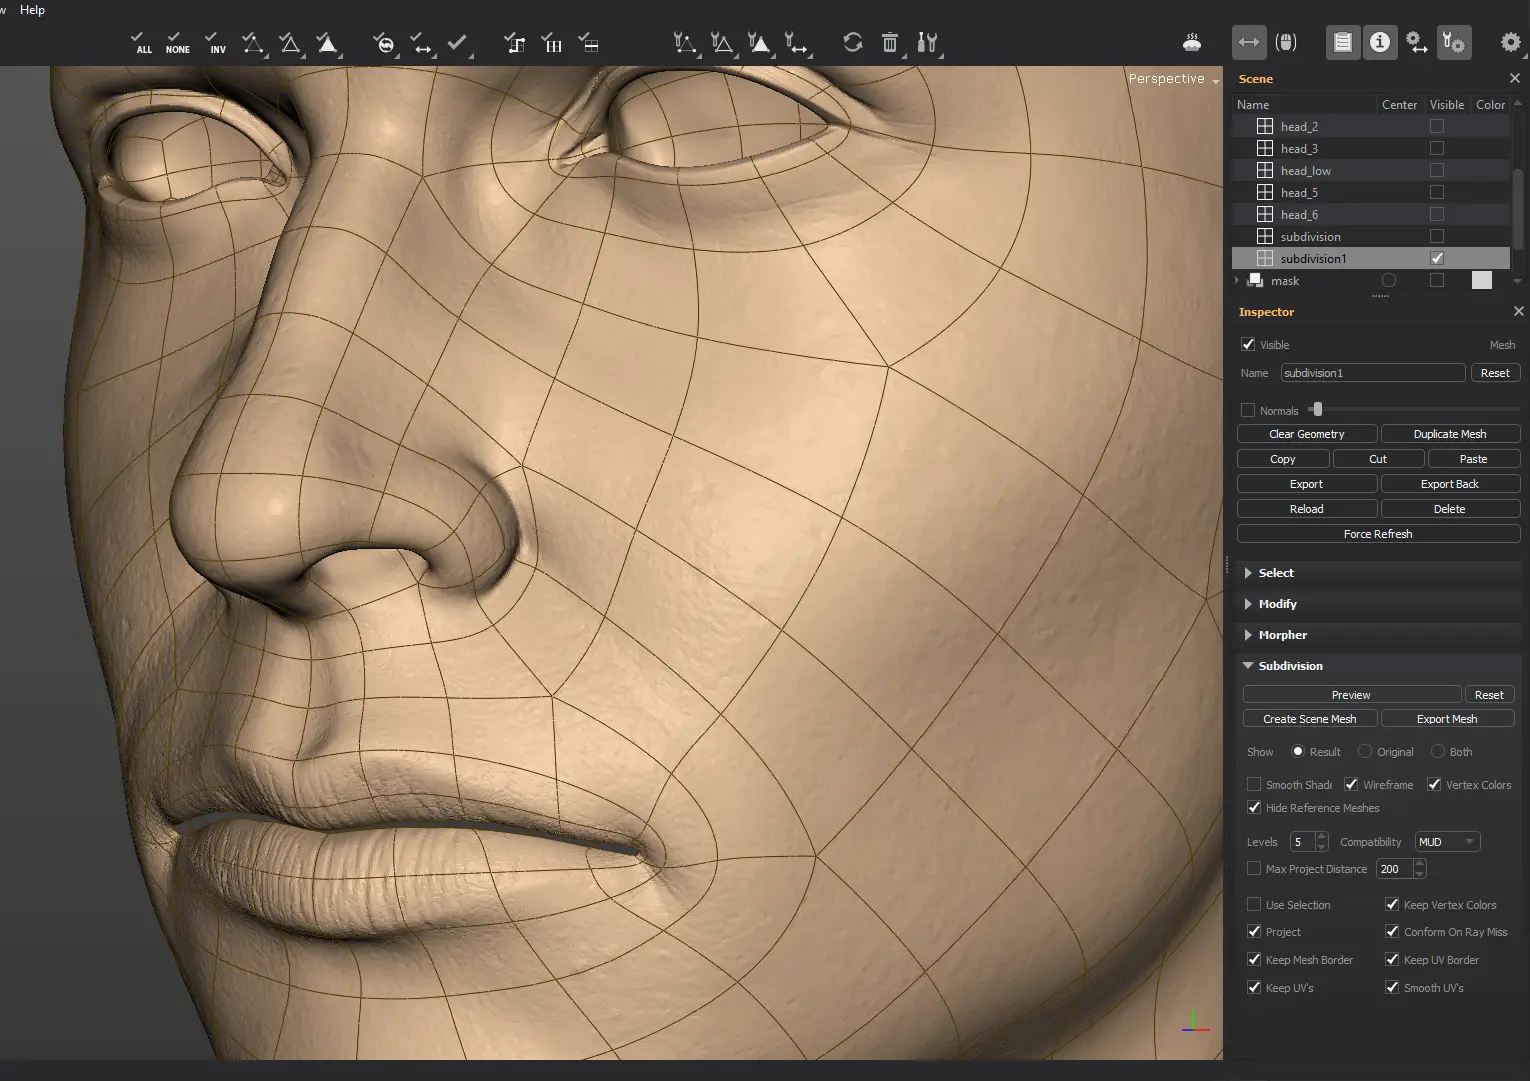
As you can see, the pores are now visible and more of the finer details in the reference mesh, now appear on the subdivision mesh.
Another important parameter in the Subdivision panel, is the ability to set the Compatibility mode. The correct Compatibility mode, depends on the brush based 3D sculpting software you use and is essential for recovering the levels that lie in between the lowest level(retopologized cage), and highest level (subdivided mesh). This allows further detailing and sculpting in your sculpting app.
Choose MUD for .mud file compatibility and ZTL for .ztl compatibilty.
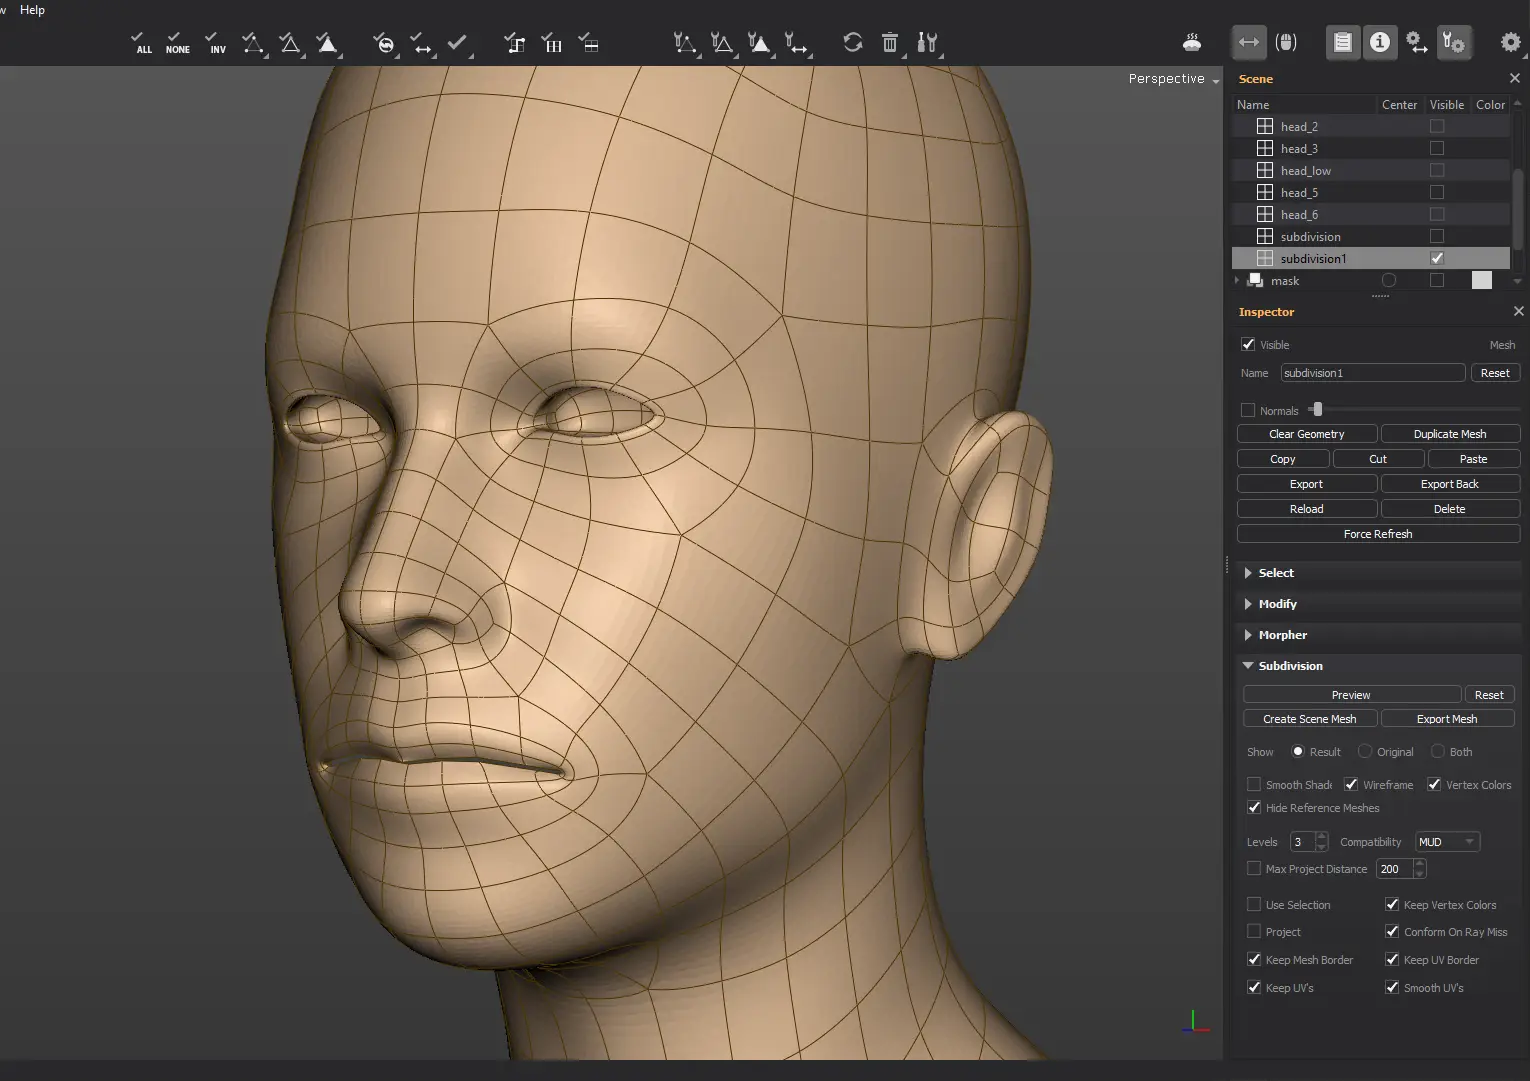
You can also choose between smooth or flat shading of the subdivision mesh by checking or unchecking the Smooth Shade checkbox in the Subdivision Parameters window:
Smooth shading on:
Smooth shading off:
The Project checkbox allows you to turn on or off the way the subdivision mesh wraps onto the reference mesh. By unchecking the Project option, you will get a smoothed out version of the subdivided mesh and none of the high resolution details of the reference mesh will be recovered.
This is what the subdivided mesh looks like when Project checkbox is left unchecked:
Sometimes you might only want to reconstruct a partial set of details from the reference mesh. You may decide that you want to turn the whole lowpoly cage into a subdivision surface, but you only want to project certain areas of detail from the reference mesh onto the resulting subdivided mesh. A perfect example of how this would come in handy is when you have a partial reference mesh, such as an object with holes or missing parts, and you only need to get the existing details.
In that case you would use the Use Selection option. By checking this option, the whole cage will get subdivided in the usual manner, but only the selected polygons will have the detail from the reference mesh projected onto them.
In our example, we want to create a subdivision mesh, but only want to project the detail in the reference mesh to the area around the eyes. So we select the lowpoly faces whose detail we want to have projected, and check the Use Selection option before we preview the subdivision mesh:
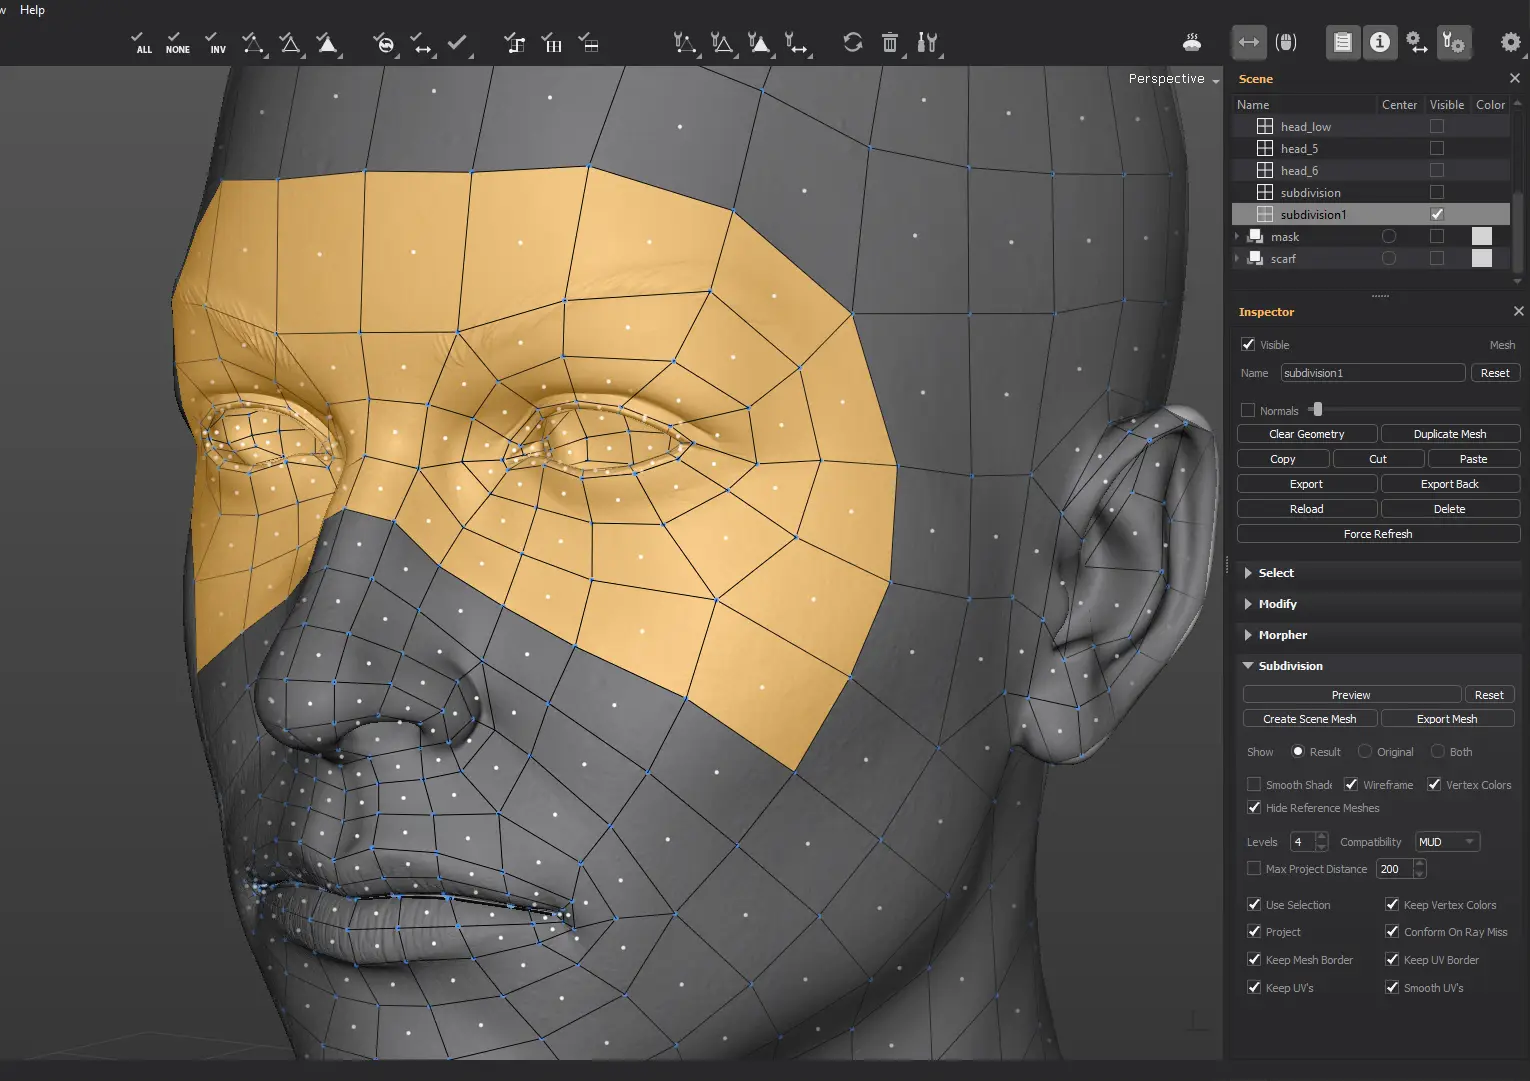
As you can see, only the polygons that were selected are projected onto the reference mesh, the rest of them where simply subdivided.
In order to export the subdivision mesh, click on the Export Mesh button.
In order to import the subdivision mesh in a sculpting application, first export the lowpoly mesh from TopoGun as an .obj file (File->Export Mesh) and import it to your sculpting application. Subdivide it to the exact number of subdivision levels you've used for the subdivided mesh in TopoGun. Then import the subdivision mesh you saved from TopoGun, into your sculpting application using the instructions in your sculpting app's manual.